Mac 上编译 CUDA+Tensorflow
- MacOS High Sierra Version 10.13.6(17G6030)
- NVIDIA Web Driver 387.10.10.10.40.124
- CUDA Toolkit 10.0
- cuDNN 7.5
- NVIDIA Collective Communications Library (NCCL) 2.4.2-1
- Python 3.6.8
- Anaconda 2019.3
- Xcode 9.4
- Command Line Tool for Xcode 9.4
- Jdk 8u211
- Bazel 0.19.2
| Python Version | Status | Branch |
|---|---|---|
| 3.6.8 |  |
r1.12 |
| 3.6.8 | |
r1.12.2 |
| 3.6.8 |  |
r1.13 |
| 3.6.8 | |
r1.14 |
| 3.7 + | |
All |
编译前准备
- 1.禁用 System Integrity Protection(SIP)
- 2.安装 Xcode 9.4
- 3.安装 Anaconda 并安装 Python 3.6.8
- 4.安装 NVIDIA Runtime
- 1.安装 NVIDIA Web Driver
- 2.安装 CUDA Toolkit
- 3.安装 cuDNN
- 4.安装 NVIDIA Collective Communications Library (NCCL)
- 5.使用 Homebrew 安装库
- 1.安装 coreutils
- 2.安装 openmp
- 6.安装 Jdk 8
- 7.安装 Bazel
禁用 SIP
打开终端输入,关闭系统完整性保护1
csrutil disable; reboot
安装 Xcode 9.4
下载 Xcode9.4.xip
苹果开发者下载平台
Xcode 9.4
随后解压拷贝至 Applications, 打开终端运行将 Xcode 9.4 设置为默认1
sudo xcode-select -s /Applications/Xcode9.4.app
若你之前安装过其他版本的Xcode可能会安装匹配的Command Line Tool,需要更换其版本
Command Line Tool for 9.4
安装 Anaconda
在官网下载 Anaconda 并安装
Anaconda 下载页面
官网安装文档
Anaconda 安装向导
安装完成后,打开终端更换Python版本为3.6.81
conda install python=3.6.8
随后,输入 Python 验证是否为3.6.8版本1
2
3
4
5(base) iMac:~ admin$ python
Python 3.6.8 |Anaconda, Inc.| (default, Dec 29 2018, 19:04:46)
[GCC 4.2.1 Compatible Clang 4.0.1 (tags/RELEASE_401/final)] on darwin
Type "help", "copyright", "credits" or "license" for more information.
>>>
安装 NVIDIA Runtime
- 1.安装 NVIDIA Web Driver
- 2.安装 CUDA Toolkit
- 3.安装 cuDNN
- 4.安装 NVIDIA Collective Communications Library (NCCL)
安装 Web Driver
选择与自己系统匹配的版本,下载下来并安装
下载地址
安装 CUDA Toolkit
在 archive 选择 CUDA Toolkit 10.0下载
CUDA Toolkit Archive
下载后安装,并配置变量到 .bash_profile1
2
3
4export CUDA_HOME=/usr/local/cuda
export DYLD_LIBRARY_PATH=/usr/local/cuda/lib:/usr/local/cuda/extras/CUPTI/lib
export LD_LIBRARY_PATH=$DYLD_LIBRARY_PATH
PATH=$DYLD_LIBRARY_PATH:$PATH:/Developer/NVIDIA/CUDA-10.0/bin
随后输入 nvcc -V 测试是否配置正确1
2
3
4
5(base) iMac:~ admin$ nvcc -V
nvcc: NVIDIA (R) Cuda compiler driver
Copyright (c) 2005-2018 NVIDIA Corporation
Built on Sat_Aug_25_21:08:56_CDT_2018
Cuda compilation tools, release 10.0, V10.0.130
检测 CUDA 是否能正常工作,切换目录到 CUDA Samples1
cd /Developer/NVIDIA/CUDA-10.0/samples/1_Utilities/deviceQuery
若出现以下情况,请说明 Command Line Tool 版本不受支持,请更换版本1
nvcc fatal : The version ('8.0') of the host compiler ('clang') is not supported
安装 cuDNN
下载 cuDNN 并解压到 CUDA 目录下,注意选择对应的 CUDA 版本
cuDNN 下载地址
下载后解压到 CUDA 目录1
2
3
4
5
6
7
8
9
10
11(base) iMac:cuda admin$ tree
.
├── NVIDIA_SLA_cuDNN_Support.txt
├── include
│ └── cudnn.h
└── lib
├── libcudnn.7.dylib
├── libcudnn.dylib -> libcudnn.7.dylib
└── libcudnn_static.a
2 directories, 5 files
安装 NCCL
下载 NCCL
NCCL 下载地址
下载后解压,并配置软链接,注意替换成自己下载的版本1
2
3
4
5
6
7
8
9brew install xz
xz -d nccl_<verison>+cuda10.0_x86_64.txz
tar xvf nccl_<verison>+cuda10.0_x86_64.tar
sudo mkdir -p /usr/local/nccl
cd nccl_<version>+cuda10.0_x86_64
sudo mv * /usr/local/nccl
sudo mkdir -p /usr/local/include/third_party/nccl
sudo ln -s /usr/local/nccl/include/nccl.h /usr/local/include/third_party/nccl
Homebrew 部分
安装 coreutils1
brew install coreutils
安装 openmp1
brew install cliutils/apple/libomp
安装 Jdk
下载 Jdk 并根据向导安装 (解决Bazel安装问题,请下载JDK8)
Jdk 下载地址
验证 Jdk 是否安装成功1
2
3
4
5(base) iMac:cuda admin$ java -version
java version "1.8.0_211"
Java(TM) SE Runtime Environment (build 1.8.0_211-b12)
Java HotSpot(TM) 64-Bit Server VM (build 25.211-b12, mixed mode)
(base) iMac:cuda admin$
安装 Bazel
使用新版本的 Bazel 可能会导致编译失败,现在需要下载低版本(0.19.2)的 Bazel 来进行编译
下载安装完成后配置环境变量1
export PATH="$PATH:$HOME/bin"
环境变量的配置根据 Bazel 安装的位置来进行确认,这里默认安装的是用户的主目录
激活环境变量
打开控制台输入1
source .bash_profile
开始编译
- 1.下载源码
- 2.编译配置
- 3.开始编译
- 1.Bazel 编译
- 2.PIP 包编译
下载 Tensorflow 源码
从 github 上下载 tensorflow的源码1
2git clone https://github.com/tensorflow/tensorflow.git
cd tensorflow
默认使用 master 分支,如需要调整成其他分支,请如下配置(r1.14以上版本 Bazel 需要 0.24 以上如需编译请更换 Bazel 版本)1
git checkout branch_name # r1.9, r1.10, etc.
由于 Mac 不支持 align(sizeof(T)) 所以需要将他们移除1
2
3sed -i -e "s/ __align__(sizeof(T))//g" tensorflow/core/kernels/concat_lib_gpu_impl.cu.cc
sed -i -e "s/ __align__(sizeof(T))//g" tensorflow/core/kernels/depthwise_conv_op_gpu.cu.cc
sed -i -e "s/ __align__(sizeof(T))//g" tensorflow/core/kernels/split_lib_gpu.cu.cc
配置编译
打开控制台输入1
./configure
根据提示进行配置,除了是否使用 CUDA Support 其他都默认写 No1
2
3
4
5
6
7
8
9
10
11
12
13
14
15
16
17
18
19
20
21
22
23
24
25
26
27
28
29
30
31
32
33
34
35
36
37
38
39
40
41
42
43
44
45
46
47
48
49
50
51
52
53
54
55
56
57
58
59
60
61
62
63
64
65
66
67
68
69(base) iMac:tensorflow admin$ ./configure
WARNING: --batch mode is deprecated. Please instead explicitly shut down your Bazel server using the command "bazel shutdown".
You have bazel 0.19.2 installed.
Please specify the location of python. [Default is /Users/admin/anaconda3/bin/python]:
Found possible Python library paths:
/Users/admin/anaconda3/lib/python3.7/site-packages
Please input the desired Python library path to use. Default is [/Users/admin/anaconda3/lib/python3.7/site-packages]
Do you wish to build TensorFlow with XLA JIT support? [y/N]: n
No XLA JIT support will be enabled for TensorFlow.
Do you wish to build TensorFlow with OpenCL SYCL support? [y/N]: n
No OpenCL SYCL support will be enabled for TensorFlow.
Do you wish to build TensorFlow with ROCm support? [y/N]: n
No ROCm support will be enabled for TensorFlow.
Do you wish to build TensorFlow with CUDA support? [y/N]: y
CUDA support will be enabled for TensorFlow.
Please specify the CUDA SDK version you want to use. [Leave empty to default to CUDA 10.0]:
Please specify the location where CUDA 10.0 toolkit is installed. Refer to README.md for more details. [Default is /usr/local/cuda]:
Please specify the cuDNN version you want to use. [Leave empty to default to cuDNN 7]: 7.5
Please specify the location where cuDNN 7 library is installed. Refer to README.md for more details. [Default is /usr/local/cuda]: /Developer/NVIDIA/CUDA-10.0
Please specify a list of comma-separated Cuda compute capabilities you want to build with.
You can find the compute capability of your device at: https://developer.nvidia.com/cuda-gpus.
Please note that each additional compute capability significantly increases your build time and binary size. [Default is: 3.5,7.0]: 6.1
Do you want to use clang as CUDA compiler? [y/N]: n
nvcc will be used as CUDA compiler.
Please specify which gcc should be used by nvcc as the host compiler. [Default is /usr/bin/gcc]:
Do you wish to build TensorFlow with MPI support? [y/N]:
No MPI support will be enabled for TensorFlow.
Please specify optimization flags to use during compilation when bazel option "--config=opt" is specified [Default is -march=native -Wno-sign-compare]:
Would you like to interactively configure ./WORKSPACE for Android builds? [y/N]:
Not configuring the WORKSPACE for Android builds.
Preconfigured Bazel build configs. You can use any of the below by adding "--config=<>" to your build command. See .bazelrc for more details.
--config=mkl # Build with MKL support.
--config=monolithic # Config for mostly static monolithic build.
--config=gdr # Build with GDR support.
--config=verbs # Build with libverbs support.
--config=ngraph # Build with Intel nGraph support.
--config=dynamic_kernels # (Experimental) Build kernels into separate shared objects.
Preconfigured Bazel build configs to DISABLE default on features:
--config=noaws # Disable AWS S3 filesystem support.
--config=nogcp # Disable GCP support.
--config=nohdfs # Disable HDFS support.
--config=noignite # Disable Apacha Ignite support.
--config=nokafka # Disable Apache Kafka support.
--config=nonccl # Disable NVIDIA NCCL support.
Configuration finished
其中 Additional compute capability significantly GPU计算能力需要到官网找到你的设备,然后填写数值或者安装 CUDA-Z查看
开始编译
先使用 Bazel 进行编译
1 | |
下图为开始编译
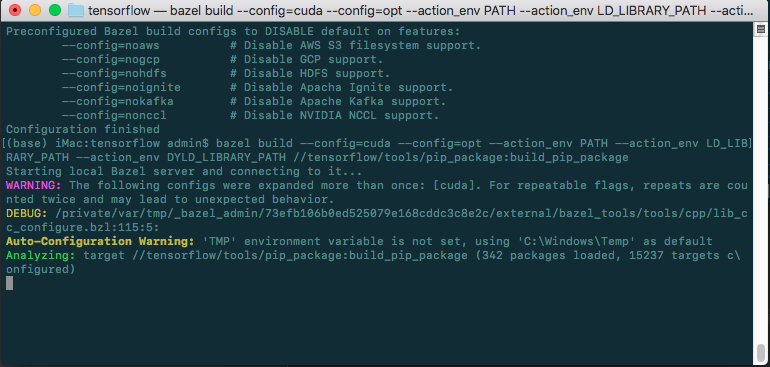
编译的时间需要根据不同的情况确定,这里大概花了1小时左右的时间,显示编译完成后,开始编译pip安装包
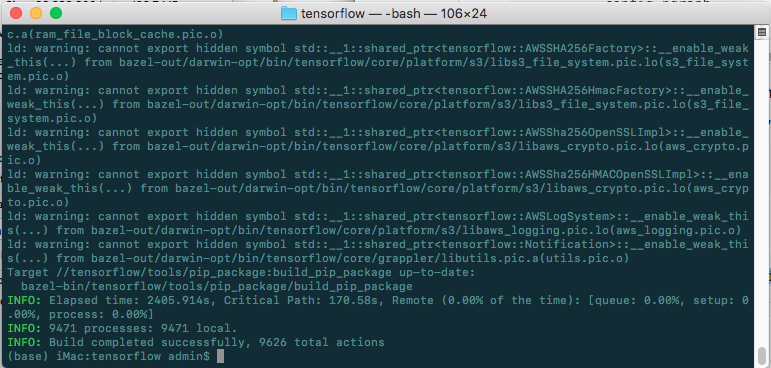
Bazel 编译完成后,开始编译PIP安装包
1 | |
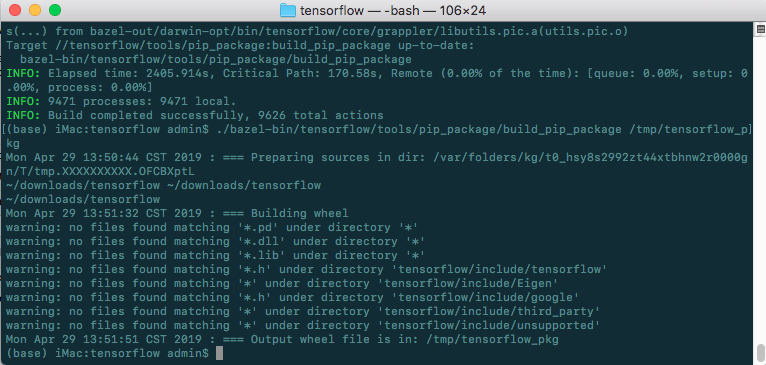
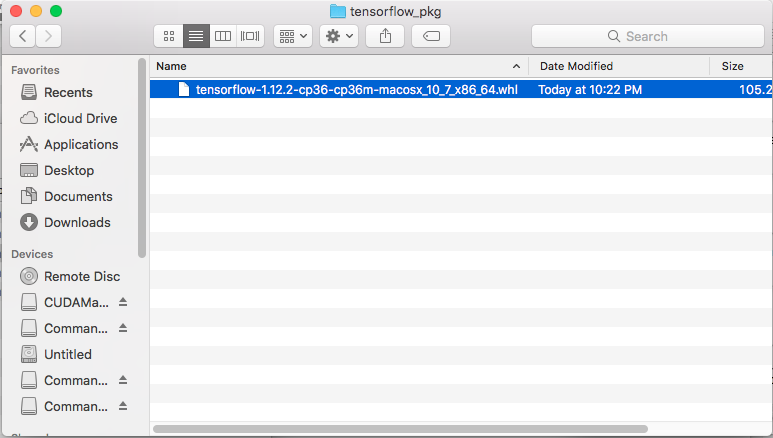
上图编译完成后会在
/tmp/tensorflow_pkg
目录下生成 whl 文件,随后使用pip安装即可